How to Calibrate Your Pipettes to ISO 8655 Standards
1 min read
Pipette calibration helps laboratories confirm that liquid handling results remain accurate, repeatable, and traceable. This guide explains how pipettes are calibrated to ISO 8655 standards, including gravimetric testing, environmental control, correct tip selection, volume testing, calibration records, and common mistakes to avoid. It also covers when to use in-house calibration and when an external calibration service may be more suitable.
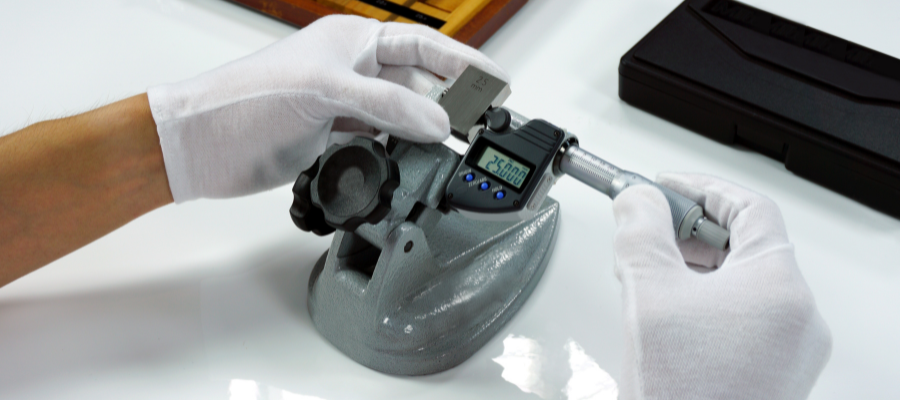
How to Calibrate Pipettes to ISO 8655 Standards
Pipettes are among the most frequently used measuring tools in the laboratory, but even high-quality pipettes can drift over time. Regular calibration helps confirm that a pipette is delivering the correct volume and that results remain accurate, repeatable, and traceable. For laboratories working in research, diagnostics, pharmaceutical testing, quality control, food testing, education, or regulated environments, pipette calibration is not just a maintenance task. It is part of good measurement practice.
ISO 8655 is the key international standard series used for piston-operated volumetric apparatus, including piston pipettes. In practical terms, it provides a framework for checking whether a pipette is dispensing liquid accurately and consistently. If your laboratory relies on laboratory pipettes for critical workflows, calibration helps protect data quality and reduce the risk of liquid handling errors.
What is ISO 8655?
ISO 8655 is an international standard series for piston-operated volumetric apparatus, including piston pipettes, piston burettes, dispensers, and dilutors. For pipettes, it is especially relevant because it helps define how performance should be assessed, including accuracy, repeatability, and test conditions.
For a laboratory user, ISO 8655 is useful because it gives a more structured way to check pipette performance. It is especially important for air-displacement pipettes, which can be affected by operator technique, temperature, humidity, liquid properties, tip fit, and instrument condition. Choosing reliable pipettes from brands such as Eppendorf, BRAND, Gilson, Sartorius, and Thermo Scientific can help build a stronger liquid handling workflow from the start.
Why pipette calibration matters
A pipette may look normal and still be dispensing incorrectly. Small volume errors can affect dilution, reagent preparation, PCR setup, ELISA workflows, cell culture, analytical chemistry, and many other laboratory methods. Regular calibration helps laboratories identify pipettes that have drifted, developed leaks, or become inconsistent through wear or poor handling.
Pipette calibration helps laboratories:
- confirm pipette accuracy and precision
- detect drift, leaks, or mechanical wear
- support quality control and audit requirements
- reduce the risk of failed experiments or invalid results
- maintain confidence in liquid handling workflows
- decide whether a pipette needs adjustment, service, or replacement
For labs replacing older pipettes or standardising their equipment, it can also be useful to compare modern options such as the Eppendorf Research plus Neo Pipette, 10 to 200 µL, the BRAND Transferpette S Adjustable 5 to 50 µL, or the Sartorius 1-Channel Pipette 20 to 200 µL mLINE.
Calibration vs adjustment
Calibration and adjustment are often confused, but they are not the same thing. Calibration is the process of checking and recording how a pipette performs against a reference method. Adjustment is the process of changing the pipette so that it delivers closer to the target volume.
A pipette can be calibrated without being adjusted. In many laboratories, it is good practice to record the “as found” result first. If the pipette fails or falls outside the required tolerance, it may then be adjusted, repaired, or serviced. After that, an “as left” result can be recorded to show the final performance after intervention.
The basic principle of gravimetric pipette calibration
The most common reference method for pipette calibration is gravimetric testing. This means the pipette dispenses purified water into a weighing vessel, and the delivered mass is measured using a suitable balance. Because water density is known at a given temperature, the measured mass can be converted into volume. The calculated volume is then compared with the pipette’s set volume.
The simplified process is:
- Set the pipette to a selected test volume.
- Aspirate purified water using the correct technique.
- Dispense the water into a weighing vessel on a balance.
- Record the measured mass.
- Repeat the process enough times for reliable results.
- Convert mass to volume using the correct correction factors.
- Calculate systematic error and random error.
- Compare the results with the required acceptance limits.
For official compliance or accredited calibration, laboratories should follow the full ISO 8655 method or use an accredited calibration provider. This article is intended as a practical overview, not a replacement for the standard itself.
Equipment needed for pipette calibration
Proper pipette calibration needs more than the pipette itself. The setup should support stable weighing, controlled environmental conditions, and consistent liquid handling technique.
Typical equipment includes:
- a suitable analytical balance or microbalance
- purified or distilled water
- a weighing vessel
- an evaporation trap or humidity control setup for small volumes
- a calibrated thermometer
- a hygrometer for humidity monitoring
- a barometer if required by the procedure
- compatible pipette tips
- calibration software or a controlled calculation sheet
- cleaning and maintenance tools
For laboratories building or upgrading a calibration setup, useful categories to review include analytical balances, laboratory pipettes, and pipette tips.
Step 1: Inspect the pipette before calibration
Before any measurement is taken, the pipette should be inspected. A damaged or poorly maintained pipette may fail calibration even if the weighing process is done correctly.
Check for:
- visible cracks or damage
- a loose or damaged tip cone
- smooth plunger movement
- correct volume setting
- secure tip attachment
- contamination inside the lower part of the pipette
- leaks or inconsistent aspiration
If the pipette is dirty, damaged, leaking, or difficult to operate, it should be cleaned, serviced, or repaired before final calibration results are accepted.
Step 2: Control the calibration environment
Pipette calibration is sensitive to environmental conditions. Temperature, humidity, air movement, evaporation, and balance stability can all affect the result. This is especially important for small-volume pipettes, where even small evaporation losses can affect the measured volume.
A good calibration area should be:
- temperature stable
- free from drafts
- away from vibration
- protected from direct sunlight
- stable in humidity
- suitable for precise balance operation
The water, pipette, tips, and balance environment should be allowed to equilibrate before testing. This helps reduce measurement variation caused by temperature differences between equipment, liquid, and the surrounding environment.
Step 3: Use the correct pipette tips
Pipette tips are a major part of pipette performance. A poor tip fit can cause leaks, inconsistent aspiration, droplets on the outside of the tip, or poor repeatability. For best results, use tips recommended by the pipette manufacturer or high-quality compatible tips.
For example, laboratories using Sartorius pipettes may also consider compatible tips such as Sartorius Optifit Pipette Tips 0.5 to 200 µL. The same principle applies when selecting tips for Eppendorf, BRAND, Gilson, and Thermo Scientific pipettes.
Step 4: Pre-wet the pipette tip
Pre-wetting the tip improves consistency by conditioning the air inside the tip and reducing variation between dispenses. This is usually done by aspirating and dispensing the test liquid several times before recording measurements.
Skipping this step can increase variation, especially with air-displacement pipettes. Consistent technique is essential throughout the calibration process.
Step 5: Test the correct volume points
Adjustable pipettes should be tested at more than one volume point. This helps confirm that the pipette performs across its working range, not just at one setting. A common approach is to test at the nominal volume, a mid-range volume, and a low volume.
For example, a variable-volume pipette may be tested at:
- 100% of nominal volume
- 50% of nominal volume
- 10% of nominal volume
The exact test volumes and number of measurements should follow the laboratory’s ISO 8655-based procedure, manufacturer guidance, or the requirements of the calibration provider.
Step 6: Use consistent pipetting technique
Good technique is essential because pipette calibration does not only test the instrument. It also reflects the way the test is performed. Even a high-quality pipette can produce inconsistent results if the operator uses poor technique.
During calibration, the operator should:
- hold the pipette vertically during aspiration
- immerse the tip to the correct depth
- aspirate smoothly and slowly
- avoid air bubbles
- pause briefly after aspiration
- dispense consistently against the vessel wall or as required by the method
- avoid touching droplets to the outside of the tip
- use the same rhythm for every measurement
Training matters. Two operators can get different results from the same pipette if their technique is inconsistent.
Step 7: Record and calculate results
Once repeated measurements have been taken, the mass readings are converted into volume. The results are then used to assess two key performance measures: systematic error and random error.
Systematic error shows how close the average delivered volume is to the target volume. This is often described as accuracy.
Random error shows how much the repeated measurements vary from each other. This is often described as precision or repeatability.
A pipette should meet both requirements. A pipette can be precise but inaccurate, or accurate on average but too inconsistent between dispenses.
Step 8: Compare results with acceptance limits
After calculating the results, compare them with the applicable acceptance limits for the pipette type, volume, and use case. These limits may come from ISO 8655, the manufacturer’s specifications, or the laboratory’s internal quality requirements.
For regulated or audited work, laboratories should define acceptance criteria clearly and document which standard or procedure was used. If a pipette fails, the next step may be cleaning, adjustment, repair, or removal from service. After adjustment or repair, the pipette should be tested again to confirm performance.
Step 9: Issue a calibration record
A proper pipette calibration record should be clear, traceable, and easy to audit. For laboratories working under quality systems, documentation is just as important as the test itself.
A calibration record should usually include:
- pipette identification number
- brand and model
- serial number
- volume range
- test volumes
- operator name or technician ID
- date of calibration
- environmental conditions
- balance identification
- tip type used
- measurement results
- calculated systematic and random error
- pass or fail result
- details of any adjustment or service
- next calibration due date, if defined by the lab
How often should pipettes be calibrated?
There is no single calibration interval that suits every laboratory. The right frequency depends on how the pipette is used, how critical the application is, the lab’s quality system, and the history of previous calibration results.
Pipettes may need more frequent calibration if they are:
- used daily or heavily
- used for regulated testing
- used with volatile or corrosive liquids
- shared by multiple users
- used in high-accuracy workflows
- dropped, damaged, repaired, or adjusted
For general research labs, calibration may be scheduled annually or semi-annually. For regulated, high-throughput, or critical testing environments, shorter intervals may be more appropriate. The best approach is to set a documented calibration interval based on risk, usage, and historical performance.
Common pipette calibration mistakes
Some of the most common issues include:
- using the wrong balance for the volume range
- not controlling evaporation for small volumes
- using poor-quality or incompatible tips
- testing only one volume point
- not pre-wetting the tip
- rushing aspiration or dispensing
- ignoring environmental conditions
- not recording “as found” results before adjustment
- using untrained operators
- assuming a pipette is accurate because it is new
Avoiding these mistakes can significantly improve confidence in calibration results.
In-house calibration vs external calibration service
Some laboratories calibrate pipettes in-house, while others use an external service provider. Both options can work, but the right choice depends on resources, quality requirements, and workload.
In-house calibration can be useful when:
- the lab has many pipettes
- fast turnaround is important
- staff are trained in gravimetric calibration
- the lab has suitable balances and environmental control
- internal checks are needed between formal calibrations
External calibration may be better when:
- accredited calibration certificates are required
- the lab does not have suitable equipment
- traceability requirements are strict
- independent documentation is needed
- pipettes need service, repair, or adjustment
Many laboratories use both approaches: internal performance checks for routine monitoring and external calibration for formal certification.
Choosing pipettes that are easier to maintain and calibrate
Calibration is easier when pipettes are durable, serviceable, and compatible with high-quality tips. When selecting new pipettes, consider brand reputation, availability of spare parts, tip compatibility, cleaning requirements, adjustment process, ergonomics, and whether manual or electronic operation is better for the workflow.
For routine manual pipetting, options such as the BRAND Transferpette S Adjustable 5 to 50 µL, Sartorius mLINE 20 to 200 µL, or Eppendorf Research plus Neo 10 to 200 µL may be suitable depending on volume range and user preference. For electronic liquid handling, the Eppendorf Xplorer Single-Channel Electronic Pipette, 50 to 1000 µL is a useful example, while higher-throughput labs may want to compare multichannel options such as the Gilson Pipetman Multichannel P12×20 or the Thermo Finnpipette E1-ClipTip 8-Channel Electronic Pipette.
Final thoughts
Calibrating pipettes to ISO 8655 standards helps laboratories confirm that their liquid handling tools are accurate, repeatable, and fit for purpose. The gravimetric method remains widely used because it links dispensed liquid volume to measured mass under controlled conditions.
A good calibration process starts with a clean, well-maintained pipette, suitable tips, a stable environment, and a balance appropriate for the pipette volume. It then relies on consistent technique, repeated measurements, correct calculations, and clear documentation.
For any laboratory where liquid handling affects results, pipette calibration should not be treated as an occasional formality. It should be part of the lab’s wider quality system, supporting better data, fewer errors, and more reliable day-to-day work. To build a stronger liquid handling setup, explore laboratory pipettes, pipette tips, and supporting analytical balances for calibration and quality control workflows.
Frequently asked questions
Most orders ship within 24 hours and arrive in 3–5 business days depending on your location.
_0.png&w=3840&q=75)
_0.png&w=3840&q=75)